Changing your DNS settings can help improve your internet speed, privacy, and connection reliability.
In this guide, we’ll walk you through two easy methods to manually change the DNS on your Windows 11 or Windows 10 PC.
(These steps also work for Windows 7.)
What Is DNS?
Before we dive into the steps, let’s understand what DNS actually is.
DNS stands for Domain Name System, and it acts as the translator of the Internet.
Here’s how it works:
Every website on the internet lives on a server with a unique IP address — a series of numbers like 142.250.183.174 for Google.
Since it’s hard to remember such numbers, DNS makes life easier by converting domain names (like google.com) into IP addresses automatically.
When you type a website name into your browser, your computer asks a DNS server:
“Hey, what’s the IP address for this website?”
The DNS server looks it up — kind of like a digital phonebook — and returns the correct IP so your browser can connect to it.
In short, DNS converts human-readable domain names into machine-readable IP addresses every time you open a website.
Method 1: Change DNS via Windows Settings
This is the modern and beginner-friendly method available in Windows 10 and Windows 11.
Steps:
- On your taskbar, right-click the network or Wi-Fi icon and select “Network and Internet settings.”
- Click on “Advanced network settings.”
- If you’re on Wi-Fi, click your network and then select Hardware properties.
- If you’re on Ethernet, click Ethernet, then click Edit under IP assignment.
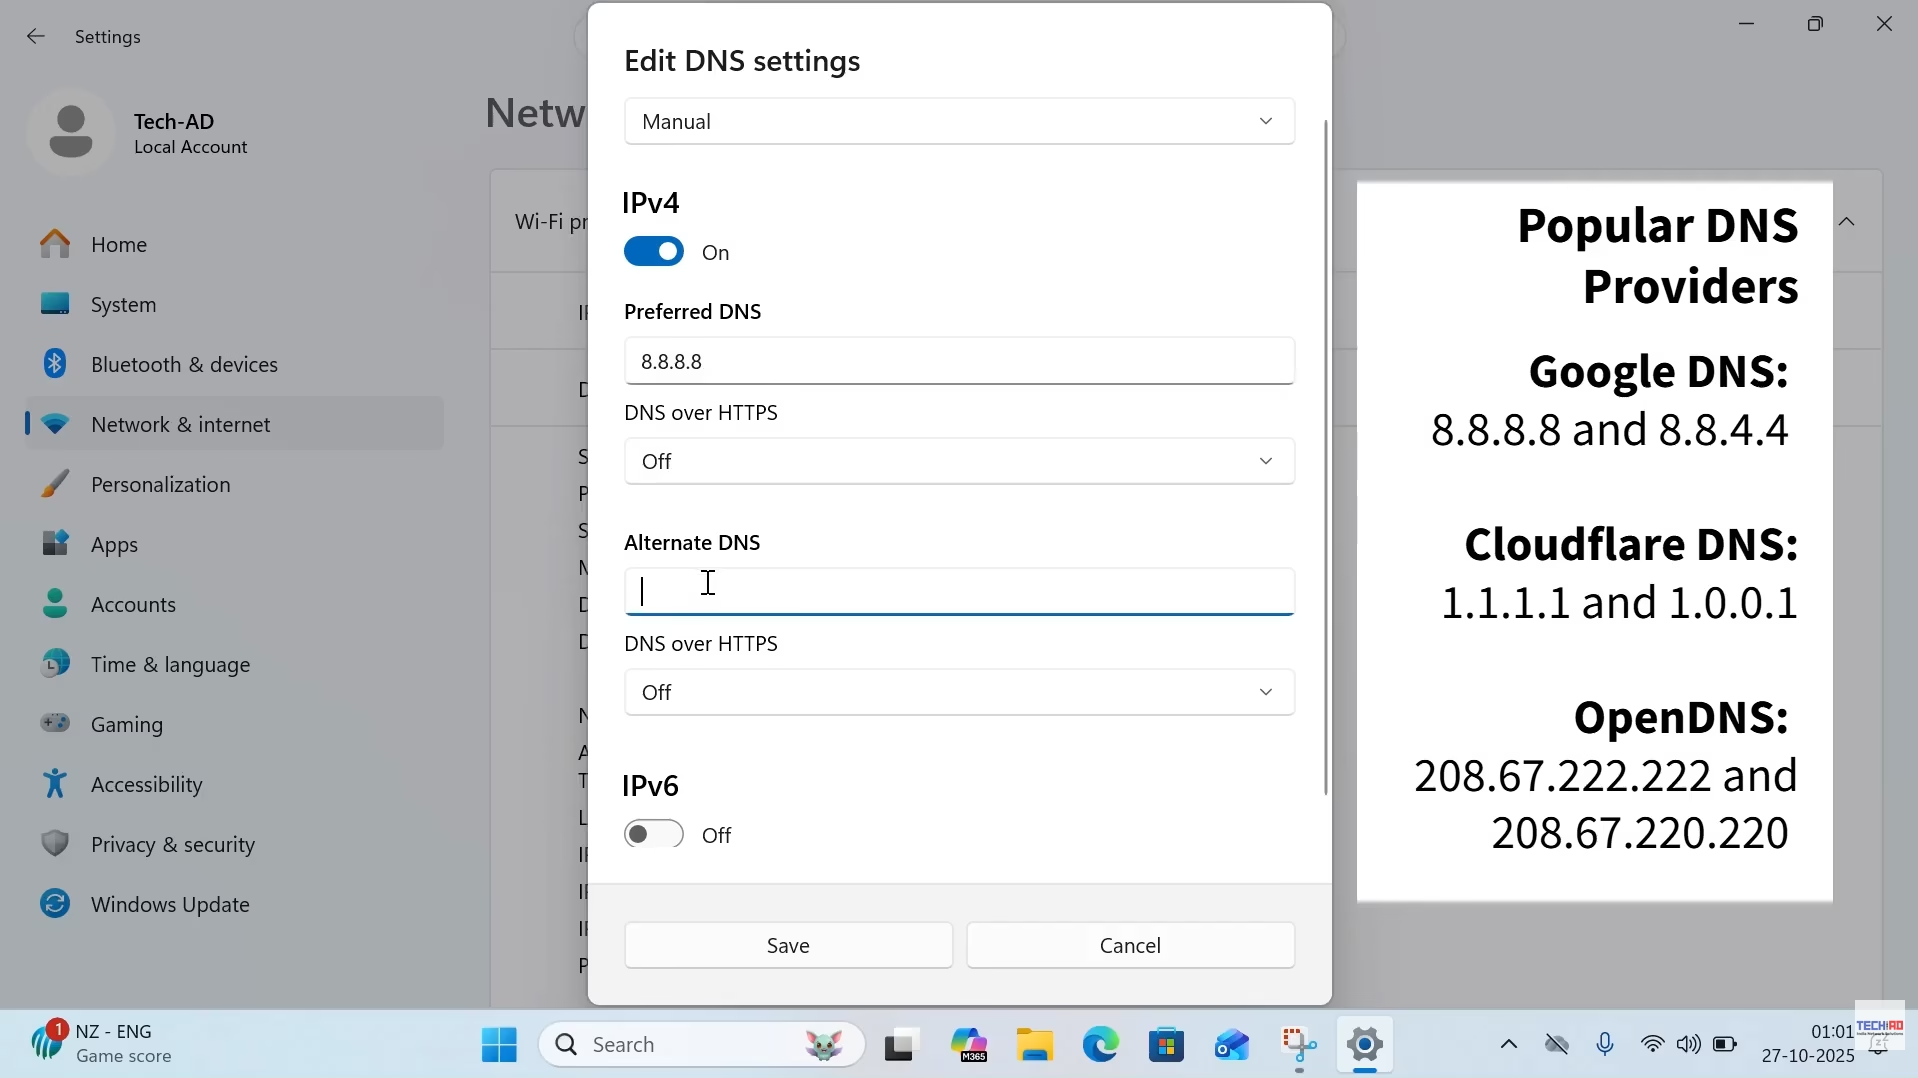
- Scroll to DNS server assignment and click Edit.
- Change the setting from Automatic (DHCP) to Manual.
- Turn on IPv4 and enter your preferred DNS servers: Google DNS:
- Preferred:
8.8.8.8 - Alternate:
8.8.4.4
- Preferred:
1.1.1.1 - Alternate:
1.0.0.1
- Preferred:
208.67.222.222 - Alternate:
208.67.220.220
- Preferred:
- Click Save, then restart your browser or PC if needed.
That’s it — your DNS has been successfully updated using the Windows Settings method.
Method 2: Change DNS via Control Panel (ncpa.cpl)
If you prefer the classic way — or if your Settings app isn’t working — this method works great on Windows 7, 10, and 11.
Steps:
- Press Windows + R, type
ncpa.cpl, and press Enter. - Right-click your active network connection and choose Properties.
- Select Internet Protocol Version 4 (TCP/IPv4) and click Properties.
- Choose Use the following DNS server addresses and enter: Google DNS:
- Preferred:
8.8.8.8 - Alternate:
8.8.4.4
- Preferred:
1.1.1.1 - Alternate:
1.0.0.1
- Preferred:
208.67.222.222 - Alternate:
208.67.220.220
- Preferred:
- Click OK, then close all windows.
You’ve now successfully changed your DNS using the Control Panel method.
Differences Between the Two Methods
Both methods achieve the same result — changing your DNS — but they serve different needs:
- The Settings method is modern, visual, and easy for beginners.
- The Control Panel method provides more control and works even if Settings is buggy or restricted.
- The Control Panel route is also helpful if you have multiple network adapters or need to troubleshoot manually.
Why Change Your DNS?
Here are some of the benefits of changing your DNS:
- Faster and more reliable website access.
- Enhanced privacy and security (especially with DNS providers like Cloudflare).
- Ability to bypass regional restrictions or DNS-related errors.
Wrap-Up
And that’s it! 🎉
You now know two quick and easy ways to change DNS on your Windows system.
If this guide helped you:
- 👍 Give it a like or share it
- 💬 Leave a comment with your questions
- 🔔 Subscribe or follow for more tech tutorials


Leave a Reply